K8 Cluster Creation + Portainer GUI
locally hosted Kubernetes K8 cluster using Containerd, connected to Portainer container for management via Web GUI
Completed
- Host Architecture
- Creating the Cluster
- Portainer Web GUI - Environment Connection
- Lessons Learned & Reflection
Host Architecture
Host Operating System
To get started with Kubernetes, I chose Ubuntu 22.04 Server LTS to use as my host OS. I chose this as I'm most familiar with this and figured it would make learning much smoother.
VM Specs (RAM, CPUs, Storage, etc)
Kubernetes doesn't require high spec machines for your nodes. Thats the best part! At the minimum, you'll want your nodes to have 2GB of RAM, and 2 CPU Cores. This is the minimum, and you can always scale this as needed.
Network Configuration
You will need to assign static IPs to your nodes. I've used DHCP Leases through my OPNsense firewall, but you can also do this within the netplan directory of your machines if you don't have access to your router.
Creating the Cluster
Configurations
I created my nodes by making clones from an Cloud-init template of an Ubuntu server that I set up. To check out how I created a template with Ubuntu Cloud Images and cloud-init on Proxmox, check out my Proxmox VM Book.
After getting getting my Ubuntu Servers up and running, installing qemu-guest-agent, and upgrading all packages, I took a snapshot of the VM to have something to rollback to incase I mess up at any point. Taking snapshots is a great practice especially when learning new technologies, as it saves you time from recreating from scratch and allows you to roll back to certain states you save. The following are steps I took on my Master-Node to configure and prepare my nodes for my Kubernetes Cluster.
After establishing my SSH connection to my server, I followed the steps outlined below and ran the corresponding commands to configure my VMs
VM Set Up and Initial Configurations
Disable Swap
Kubernetes does not get along with swap enabled, so I need to disable it. To do this, I ran the command in my terminal window to temporarily disable swap:
sudo swapoff -aNext, I ran the command to edit the fstab file and comment out and keep swap turned off even after reboots:
sudo nano /etc/fstabTo confirm I've done this correctly, run the command to view swap usage:
free -m
Hostnames Static IP or Static Leases
Your nodes will each require a static IP or Static DHCP lease. I've set up Static Leases for all of my nodes via OPNsense. To assign static IPs directly on the server, you'll need to edit and make changes to the .yaml file in the netplan directory.
You'll also need to make sure each VM node has been assigned a hostname. Run the command to view your hostname:
cat /etc/hostnameInstall Container Runtime (containerd)
Kubernetes requires a container runtime. I'll be using Containerd. To get started with this, update all your packages and then run the following command:
sudo apt install containerdCheck that the service is running by following command:
systemctl status containerd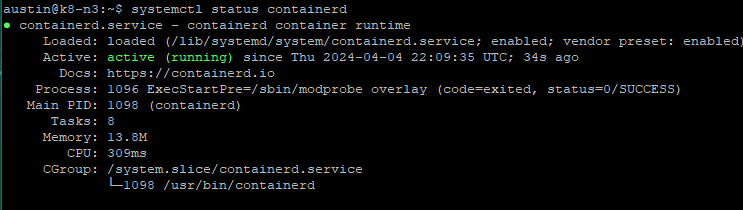
After confirming it's running, create a new directory for containerd within /etc by running the following command:
sudo mkdir /etc/containerdNext, write the default configuration to containerd by running the following command:
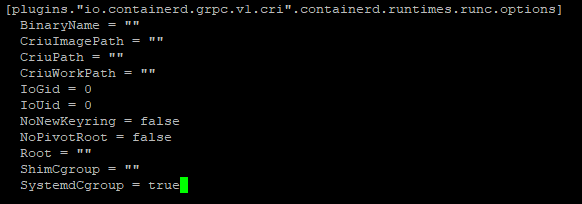
containerd config default | sudo tee /etc/containerd/config.tomlNow, use whatever editor you like, I use nano, and edit the config file. Search for runc.options within the file, and change the systemdCgroup value to true:
sudo nano /etc/containerd/config.tomlEnter Ctrl+W to search within the file for runc.options and change the SystemdCgroup value
Systemctl.conf Configuration
Run the following command to edit the sysctl.conf file:
sudo nano /etc/sysctl.confFind the line that enables packet forwarding for IPv4 and uncomment it so it can be read by the system:


This allows your nodes to communicate with each other and is crucial to get your cluster to work
k8s.conf Configuration
The next file to edit is the k8s.conf file. Run the following command:
sudo nano /etc/modules-load.d/k8s.confThis is a blank file. Add "br_netfilter" and save the file:

The bridge netfilter essentially ensures that network bridging is supported throughout the cluster. After this is done. reboot your VMs.
Kubernetes Installation
With our VMs running, we can now install Kubernetes packages. To do this, we'll need to add the Kubernetes repository gpg key and then install the repository itself. Then we can run the commands to install kubeadm, kubelet, and kubectl.
Install Kubernetes using Native Package Management
Run the command to install necessary packages in order to use the Kubernetes apt packages:
sudo apt-get install -y apt-transport-https ca-certificates curl- You might not have to install these commands, but I ran it as a precautionary measure
Run the command to make sure you have the "keyrings" directory prior to downloading the public signing key:
ls -l /etc/apt If you don't have this directory create one with the mkdir comamnd
Download the public signing key for Kubernetes package repositories. I'm downloading the most current stable release v1.29:
curl -fsSL https://pkgs.k8s.io/core:/stable:/v1.29/deb/Release.key | sudo gpg --dearmor -o /etc/apt/keyrings/kubernetes-apt-keyring.gpgRun the command to add the Kubernetes apt repositories:
echo 'deb [signed-by=/etc/apt/keyrings/kubernetes-apt-keyring.gpg] https://pkgs.k8s.io/core:/stable:/v1.29/deb/ /' | sudo tee /etc/apt/sources.list.d/kubernetes.listRun the commands to update and upgrade apt repository and packages, and then install Kubernetes:
sudo apt-get update && sudo apt-get upgrade
sudo apt-get install -y kubectl kubeadm kubelet
Create Worker Template Node (optional)
At this stage. we now have a node that is properly configured and has the Kubernetes packages installed. I created a template of this VM so that in the future, I can add nodes to any cluster much faster and skip all of this configuration and initial set up. It's relatively simple to do this in Proxmox, but first, we'll want to clean up our VM so that configurations like static assignments and machine-id won't get cloned. Run the following commands to do so:
First, clean cloud-init with the following command:
sudo cloud-init cleanRemove the instances in the cloud repository by running the following command:
sudo rm -rf /var/lib/cloud/instancesNext, reset the machine-id (this avoids having your clones use the same static IP) by running the following command:
sudo truncate -s 0 /etc/machine-idRemove the machine-id in the dbus directory by running the following command, and then create a symbolic link by running the following commands:
sudo rm /var/lib/dbus/machine-id
sudo ln -s /etc/machine-id /var/lib/dbus/machine-id
You can confirm this is done with ls -l and then power off this VM and and convert it to a template.
Initialize Pod Network on your Controller Node
From my template, I've created 4 clones:
- k-ctrlr
- k8-n1
- k8-n2
- k8-n3
My cluster will have 1 Controller node, and 3 worker nodes. The specs for my nodes are as follows:
- Controller
- 4 Gb RAM
- 4 CPU Cores
- Worker
- 2 GB RAM
- 2 CPU Cores
After powering up the node vms, ensure they have static IPs, or assign Static leases in your router (OPNsense in my case).
To initialize the following command, run the following command after editing certain parameters:
sudo kubeadm init --control-plane-endpoint=192.168.2.39 --node-name k-ctrlr --pod-network-cidr=10.244.0.0/16- For --control-plan-endpoint, edit this to make it your Controller Nodes IP. In my case, I've assigned k-ctrlr 192.168.2.39
- For --node-name, enter your Controller Node's hostname, in my case it is k-ctrlr
- Leave pod network the same. Changing this is possible, but will require additional configurations.

After initialization, you'll see the following output, which contains commands including keys and tokens to add nodes to the cluster:
 I've greyed out my tokens and hash value. Save these in a .txt file or somewhere accessible as we'll be using this in the near future to join our other 3 nodes to the cluster.
To complete this initialization and to allow yourself to control your cluster as a regular user run the following commands:
mkdir -p $HOME/.kube
sudo cp -i /etc/kubernetes/admin.conf $HOME/.kube/config
sudo chown $(id -u):$(id -g) $HOME/.kube/config
After doing this, your cluster has been initialized and is almost ready to add nodes.
Overlay Network
After you initialize your Controller node, run the command to view your pods:
kubectl get pods --all-namespacesYou'll notice that the coreDNS is pending. Kubernetes clusters require a Container Network Interface (CNI) based Network Add On. I used flannel, but there are plenty of options to choose from and can be found in the Kubernetes Install Docs.
To install and apply the add on run the following command:
# kubectl apply -f <add-on.yaml> is the command
# I ran the command below to install Flannel
kubectl apply -f https://github.com/flannel-io/flannel/releases/latest/download/kube-flannel.yml
If using flannel, check out their github repo and the ReadME.txt for more installation instructions.
Adding Nodes to Cluster
When adding nodes to your cluster, you'll need the tokens saved during initialization to run commands in your worker nodes windows. If you don't have these, you can generate new tokens with the following command:
kubeadm token create --print-join-command- If joining nodes after 24 hours since token creation, you'll need to generate new tokens
Run the following command in each of your Node terminal windows:
sudo kubeadm join 192.168.2.39:6443 --token entertokenhere --discovery-token-ca-cert-hash hashvaluehere- Replace 192.168.2.39 with your controller nodes Static IP
- Replace entertokenhere with your token you generated
- Replace hashvaluehere with the sha256 value you generated
The node will run some checks and will then join the cluster:
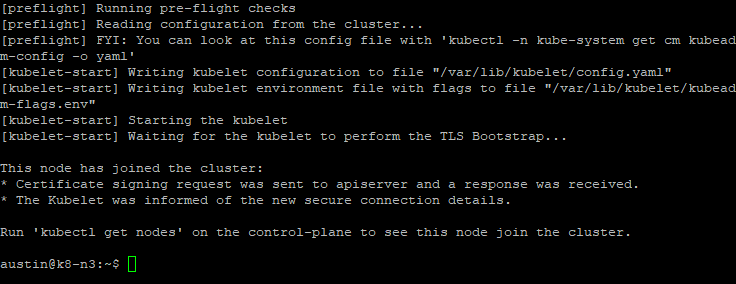
To confirm it's joined your cluster and check your node statuses, run the following command in your Controller Node:
kubectl get nodes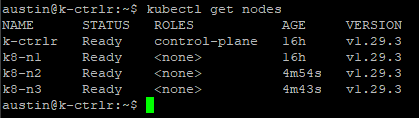
- You can now see the Name, Status, Role, Age, and Kubernetes version being run
Your cluster is now created and ready for you to launch and work with whatever services you'd like! Check out the next page to see how I connected this cluster to my Portainer docker container!
Portainer Web GUI - Environment Connection
With my K8 cluster now set up, I'm going to connect this cluster to my Portainer container running in my local Docker engine on another VM I have in Proxmox. For more details about my Portainer set up, check out my Docker Containers book. Portainer is a Web GUI container you can use for Kubernetes and Docker management, and it'll allow me to manage and deploy containers and clusters. See below to view how I set up my connection:
Portainer Agent
To connect this cluster, I'll be deploying a Portainer Agent onto the cluster. To do so, run the following command in any node of your cluster:
kubectl apply -f https://downloads.portainer.io/ce2-19/portainer-agent-k8s-nodeport.yaml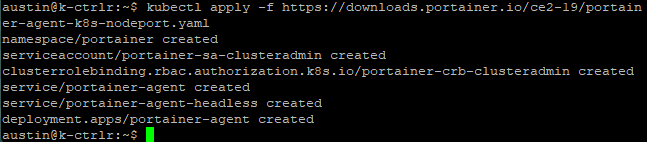
With this installed, check the status of the agent by running the following command:
kubectl get pods --namespace=portainer
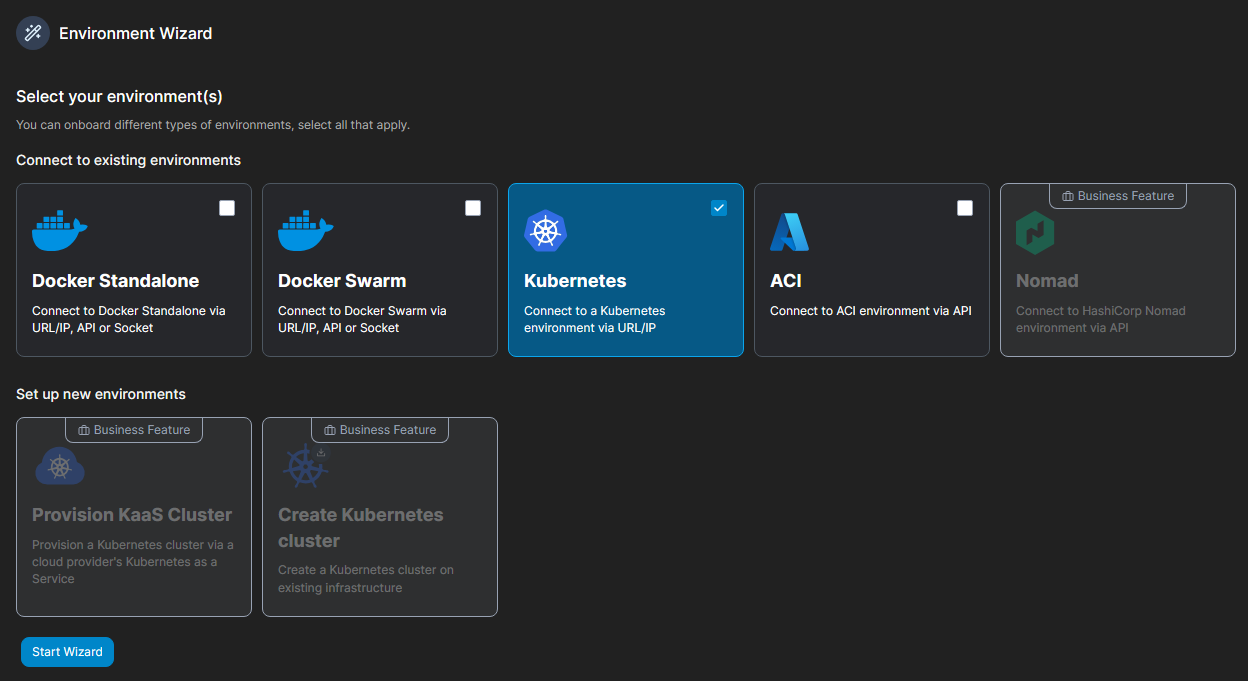
Now, open up your Portainer GUI in the web browser and navigate to Environment ---> Add. Select Kubernetes and start the wizard:
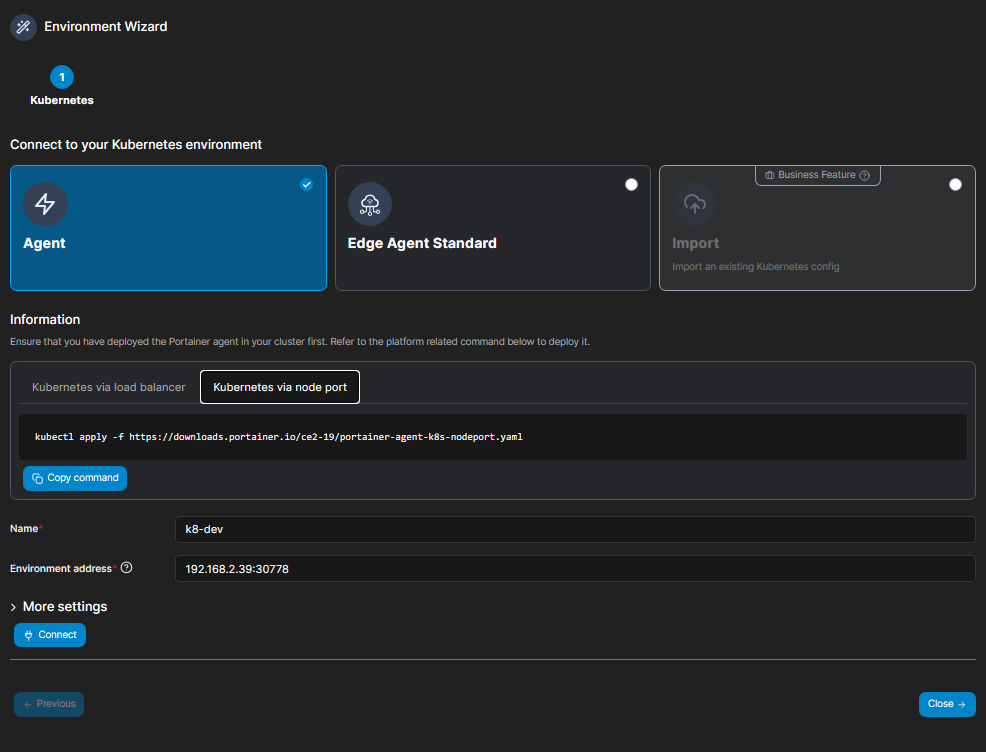
Next, enter your node IP address and specify port 30778. I'm using NordPort so 30778 applies; if you're using load balancer then use port 9001:
Your cluster should now connect, load, and be added to your dashboard:
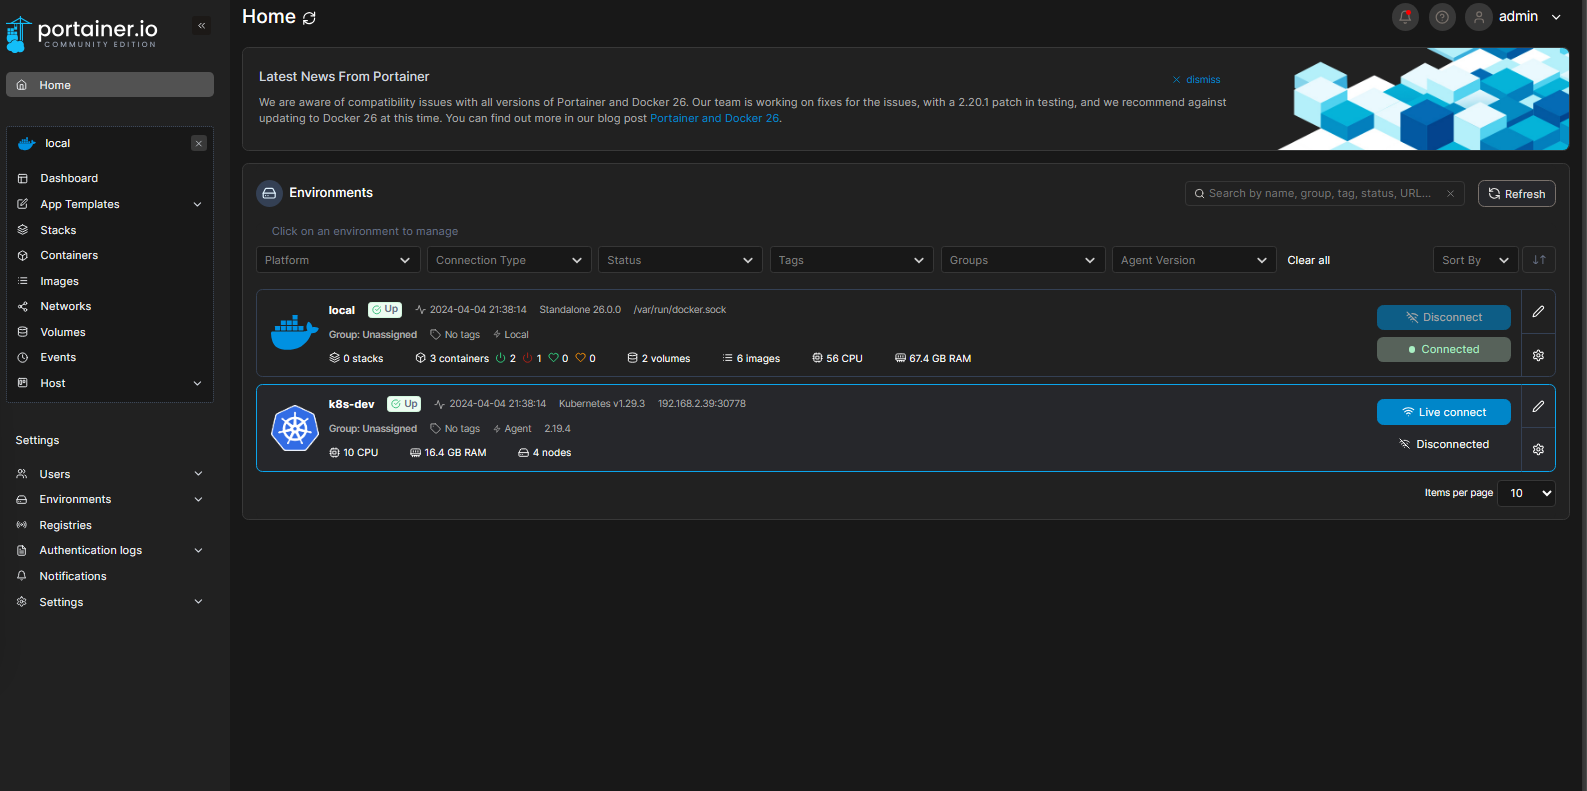
Select "Live Connect" to view your cluster resources:
The cluster is now connected to Portainer and can be managed via the Web GUI!
Lessons Learned & Reflection
Takeaways
I decided to start learning Kubernetes by building my own cluster. If you're familliar with any type of DevOps environments, then you know how important it is to understand and orchestrate Kubernetes clusters. I took my normal approach to learning new things, and dove in head first. I like to learn things hands-on, which is why I built a homelab: I can experiment, break things, build things, and not have to worry about it ruining or messing with day-to-day "critical" services I use.
Normally, when it comes to learning new technologies, I've been able to find well structured and thorough guides on how to do so. However this time was much different than previous experiences. Any guides or tutorials I could find were outdated, which is expected as Kubernetes updates are always being pushed out. The Official Docs were great in explaining all of the components, but the installation wasn't the clearest. and I definitely messed up my VMs and had to restart a couple of times. More than a couple. The biggest takeaway I've learned from this experience is creating snapshots at important stages. I've wasted plenty of time by making mistakes, then not being able to undo them and having to rebuild and reconfigure new VMs. With snapshots, I could just rollback to my last-saved image state and instead of having to start from scratch, I could start from 1-2 steps from where I just was. Snapshots for me, was game changing.
Another important takeaway from this is to not rely on one source for directions, especially if its not the official documentation. I ended up piecing together different prep/build stages from 4-5 different sources/tutorials/instructions. Not everyone has the same environment or set up, and what works for them won't necessarily work for you. Learn the ins and outs of your environment and what you're trying to implement, and then adjust and adapt accordingly.
With my first locally hosted cluster set up, I'm ready to start hosting some services and running containers with Kubernetes. For my first project, I'll be launching TheHive Project, and open-source SIRP that runs alongside a Cortex Analytics engine. SIRPs are crucial components of InfoSec SOCs and deploying my own will allow me to learn a lot about how they work, how they're used for case-management, and how they can be improved. Check out my next book on TheHive project to see how I deployed it, the configurations I've made, and how you can do it yourself!
Useful Sources
- Creating a cluster with kubeadm | Kubernetes
- Installing kubeadm | Kubernetes
- Ports and Protocols | Kubernetes
- flannel-io/flannel: flannel is a network fabric for containers, designed for Kubernetes (github.com)