OPNsense
Open Source FreeBSD based Firewall
- Setup & Installation
- Initial Configurations
- Firewall Configurations
- Current Results
- ACME Certificate for Web GUI
- OPNsense Upgrade - Version 25.7
Setup & Installation
Hardware Requirements
At the minimum, your host machine for OPNsense should have the following:
- 1GHz Dual Core CPU
- 2 GB RAM
The recommended hardware, per OPNsense official documentation is as follows:
- 1.5 GHz CPU
- 8 GB RAM
- 120 GB SSD
This recommended set up will allow you to utilize the full functionality of OPNsense, which includes IDS and IPS software if desired. My host machine, a Dell OptiPlex 7050 SFF has the following specs:
- Intel i5-7600 @3.50 GHz
- 8 GB DDR4 RAM
- 512 GB SSD
Additionally, your host machine needs at least 2 RJ45 ports, 1 for your WAN connection and 1 for your LAN connection. My OptiPlex only had 1 RJ45 port, so I purchased an Intel I350-T4 NIC and installed it onto the motherboard, which gave me 4 RJ45 gigabit ports. More information about that can be found here.
Installation
Installing OPNsense onto hardware is quite easy and straight forward. Download the ISO from their official website opnsense.org and create a bootable drive. You can use Rufus, balenaEtcher, or any other software to burn the ISO onto the drive. I used Ventoy, as it allows you to store several ISOs on a single drive, which makes it much easier instead of having to go through that process again for every operating system.
Connect your modem to an RJ45 port of the host machine, and then connect either your router or laptop to another RJ45 port of the machine. A couple things to make sure you do...
- Ensure your modem is in bridge mode. This is CRUCIAL. I have an ISP-provided DOCSIS modem from Optimum (the bane of my existence), and it took numerous calls to Tech Support to set it into bridge mode as Optimum doesn't allow its customers to access modem settings. I'd recommend purchasing your own modem, but as a college student, I don't have the funds for that. If your modem is not in bridge mode, you may receive a local IP for your WAN connection which will cause errors during set up.
- Ensure your access points (APs) are also in bridge mode. Prior to this, I was using an Eero Pro 6 mesh system, which used 1 device as the "gateway router" that was wired directly to the modem and the other 2 as access points. This was giving me errors during the initial set up due to the Eero routers trying to handle the NAT/DHCP while OPNsense was doing the same.
- To solve this, I first disconnected anything OPNsense related. I then set up my Eero network using one device as the gateway connected to the router, and the other 2 as APs. Once I could confirm everything was working properly, I configured DHCP & NAT network services to work in bridge mode. This allowed the Eero devices to serve as purely APs
- Place everything into bridge mode and let OPNsense handle NAT/DHCP and everything else.
With everything set up. boot your machine and select the boot drive which has your OPNsense ISO on it.
OPNsense will run through initial configurations. To install the operating system log in with the following credentials:
Username: installer
Password: opnsense
If installed correctly, the Web GUI should be available at the designated IP that will show in the terminal console. For my machine, the Web GUI is available at the 192.168.1.1
Check out the "Configurations" Chapter to view the dashboard and available configurations!
Initial Configurations
Web GUI
After installation, a message will appear stating the Web GUI is available at XXXX.XXXX.XXXX.XXXX
My web GUI is @ 192.168.1.1
Login Page
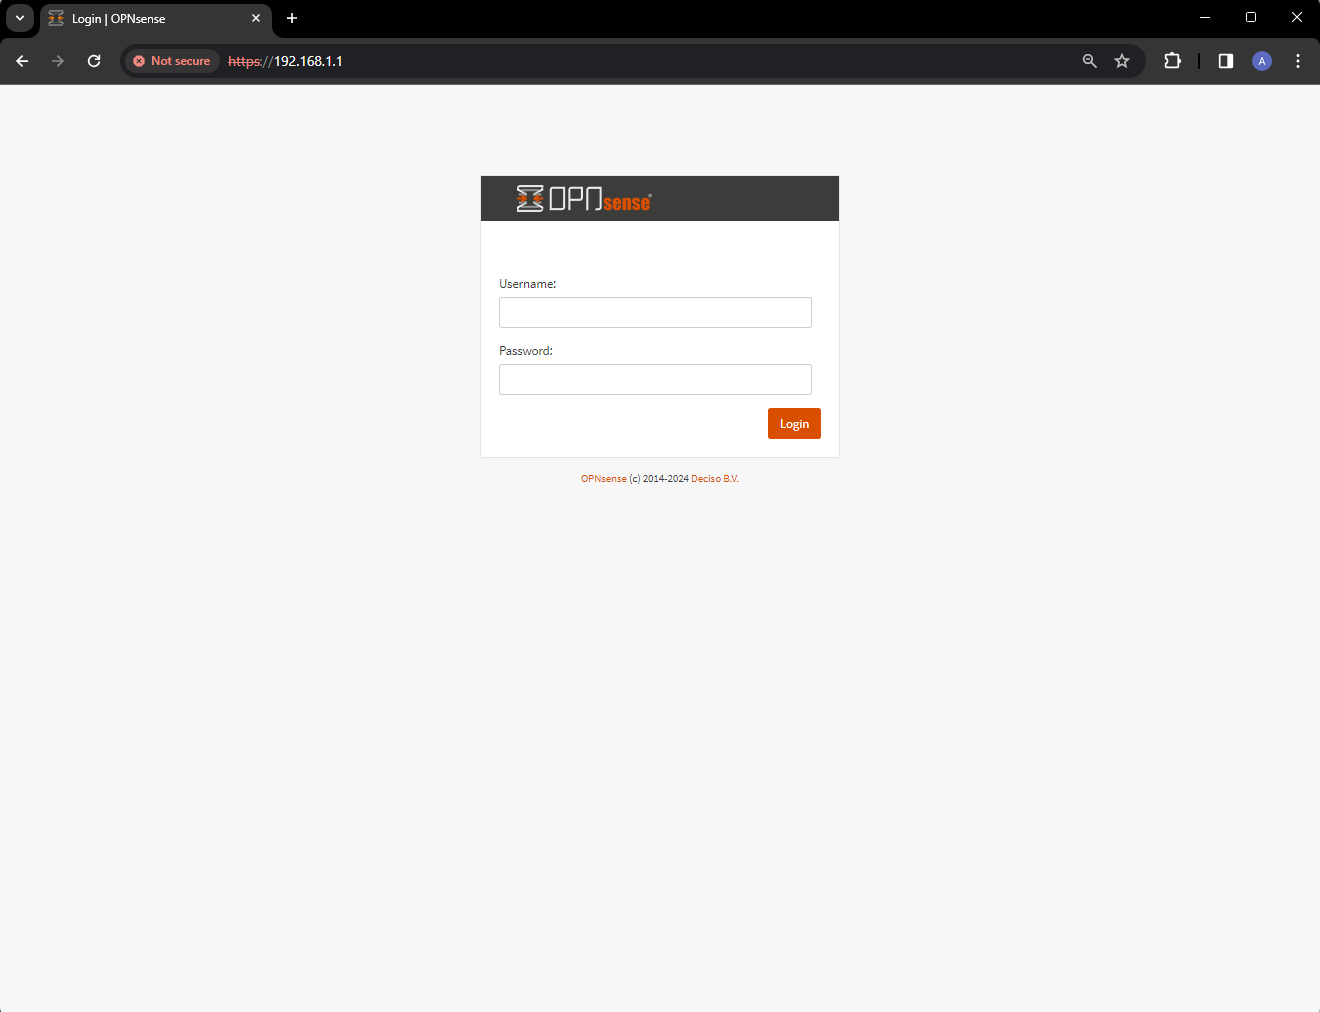
Login as root, with the password you set up during installation. Once you go through the initial set up wizard, your dashboard will show up. You can configure widgets on your dashboard however you'd like to view your most important network statistics!
I currently have both OPNsense's IDS/IPS running alongside ZenArmor's NGFW which shows me utilizing 72% of my 8gb ram. Without these 2 services, your RAM usage, if 8 GB, should be less than 30%

Interfaces
OPNsense allows you to set up Interfaces, which can be used to set up separate networks. I set up 2 interfaces to allow my homelab to operate on 1, and all other devices (including my roommates) to operate on the other. The Interface assignments are as follows:
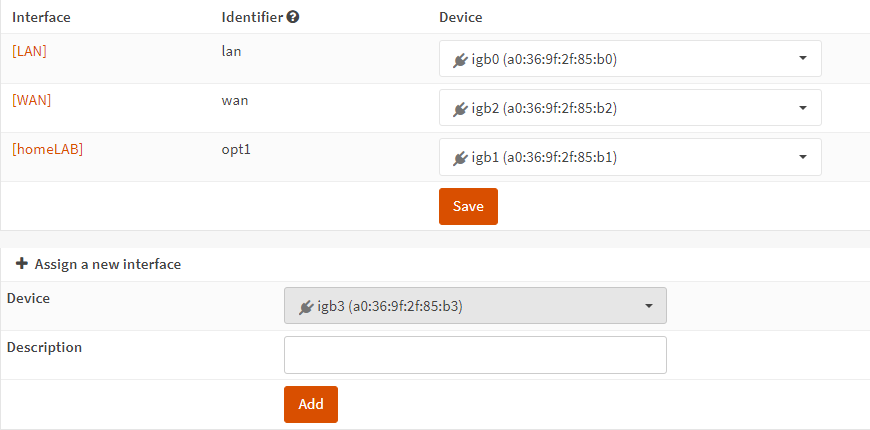
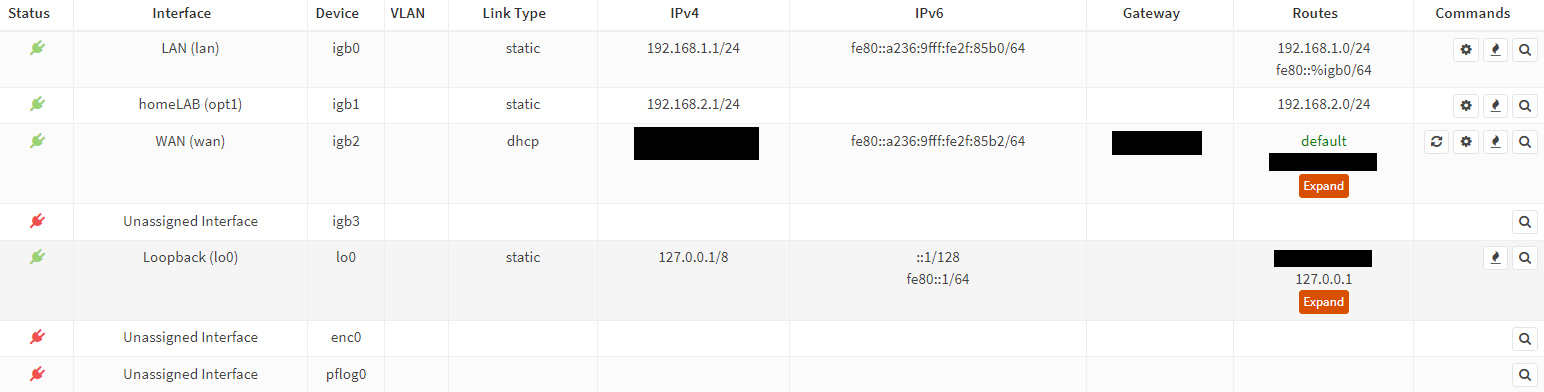
Here, you can see the devices (ports) and the interfaces you've assigned.
- igb0 = Port 1 of my NIC, which is connected directly to my Eero Mesh Router
- igb1 = Port 2 of my NIC, which connected to an 8-port gigabit switch, for my homelab
- igb2 = Port 3 of my NIC, which is my WAN connection from my modem to my OPNsense machine
- igb3 = Port 4 of my NIC, which is currently open and not connected to anything.
You can reassign these ports in the Interfaces --> Assignments tab, should you happen to change anything in the future.
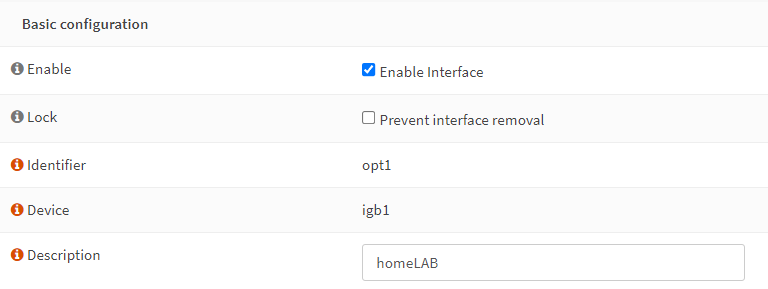
Interface Configurations
After hardwire connections and assigning interfaces to each port, you'll have to enable the interface. Navigate in the sidebar to Interfaces ---> OPT1. Enable the interface and give it a name in the description section.
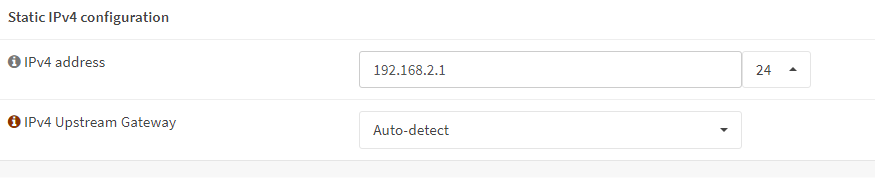
Next, assign your Interface a Static IPv4 address, and select "24" to give that IP the full range of associates IPs. I've given my homeLAB interface a static IP of 192.168.2.1/24
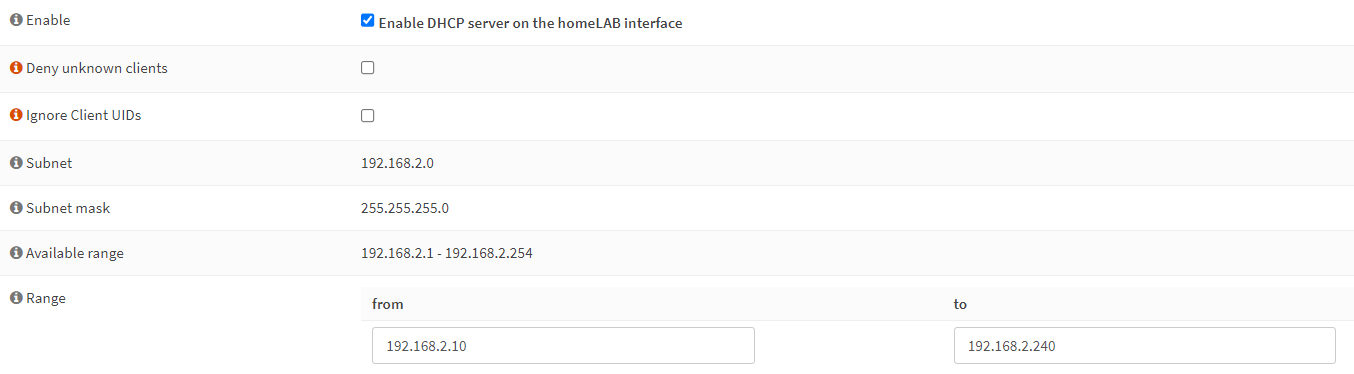
After saving changes, you'll need to first apply the changes and then adjust your DHCP server range. To do this, navigate to Services --> ISC DHCPv4 --> homeLAB (or whatever your name your new LAN). Enable DHCP server on the interface, and then designate a range of addresses in between the available range.
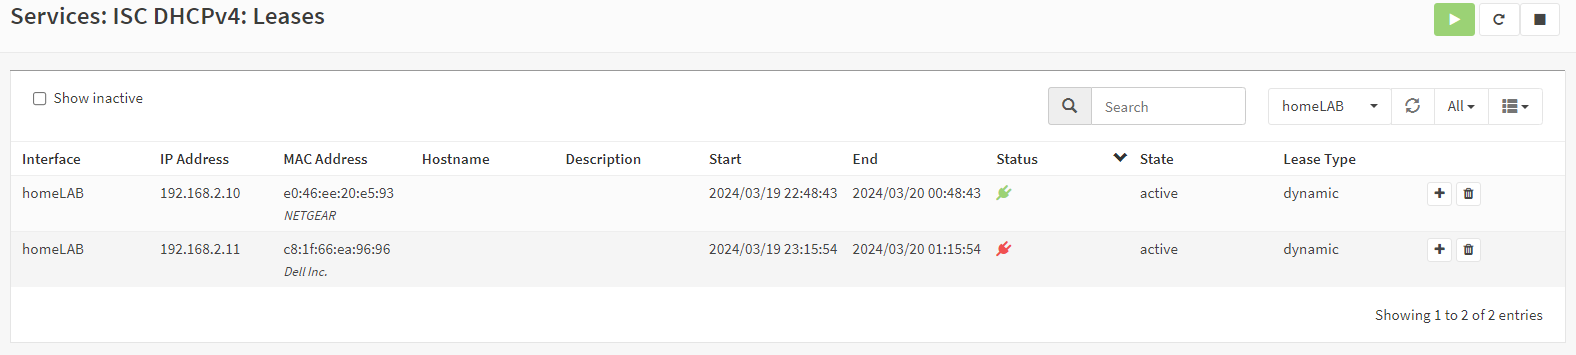
Save your changes and apply if needed. To confirm you've configured everything properly, navigate to Services --> ISC DHCPv4 --> Leases and filter for your interface, in my case, homeLAB. Here, you'll find active devices on your interface. In my case, I have my homeLAB interface going through a NETGEAR switch which is connected to my Dell PowerEdge server:
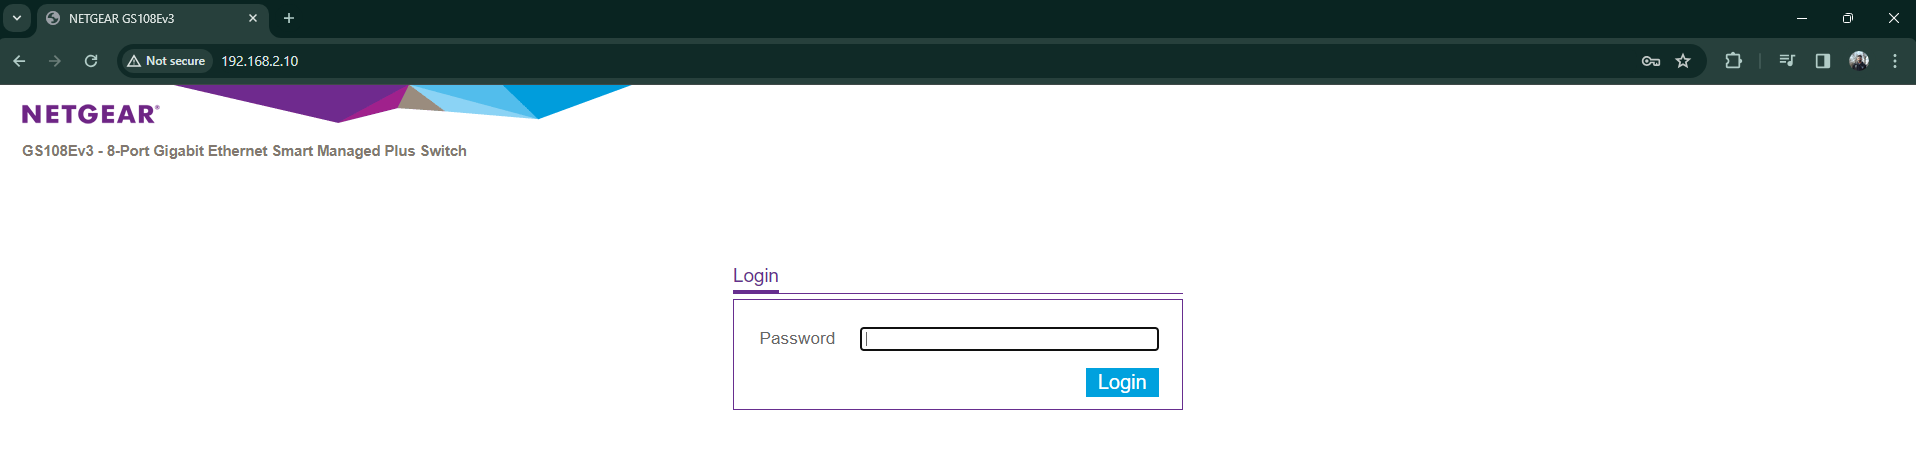
To further test it, I'll check if I can access my switch's Web GUI:
You can view all of Interface information in the Overview tab under the relevant Interfaces Section. With everything configured, it should look somewhat similar to whats below:
Firewall Configurations
Firewall Rules
Rules can be configured for each interface by navigating to the following page in your GUI...Firewall --> Rules --> Selected Interface. By default, OPNsense will generate sets of rules for each of your interfaces. You can clone, edit, delete, and rearrange the order of rules as desired. Here's an example of what my WAN rules look like:
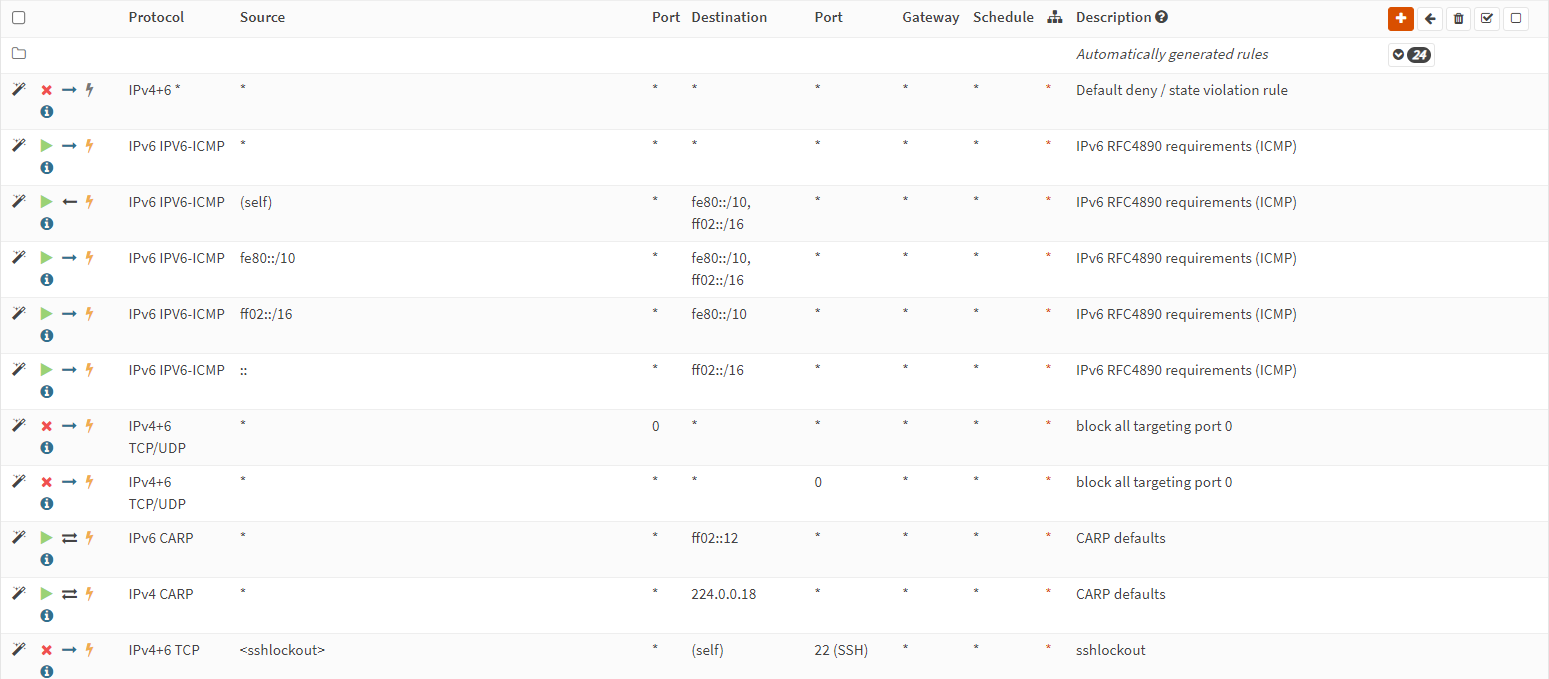
These are just a couple of rules out of the 24 that were generated. As of now, the only rules I've configured are for my LAN and homeLAB. I plan to host my NAS service with TrueNAS and am waiting on some SSDs to come in. Once I get it up and running, I'll update this page with rules accordingly.
Network Address Translation (NAT)
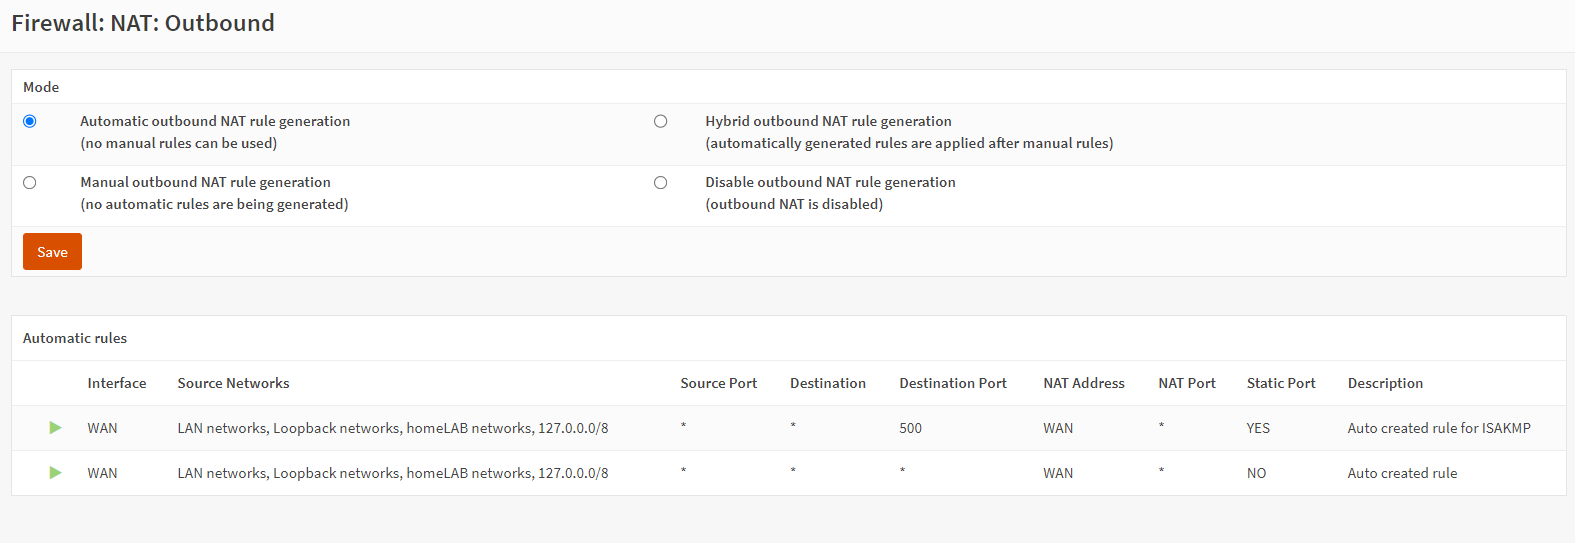
Another tab within the Firewall section is NAT, which allows you to configure and set up port forwarding. I'll most likely be using this more when I set up my NAS later this week.
In addition to port forwarding, you can configure rules for One-to-One connections, Outbound connections, and NPTv6:
One-to-One

Outbound
NPTv6

Current Results
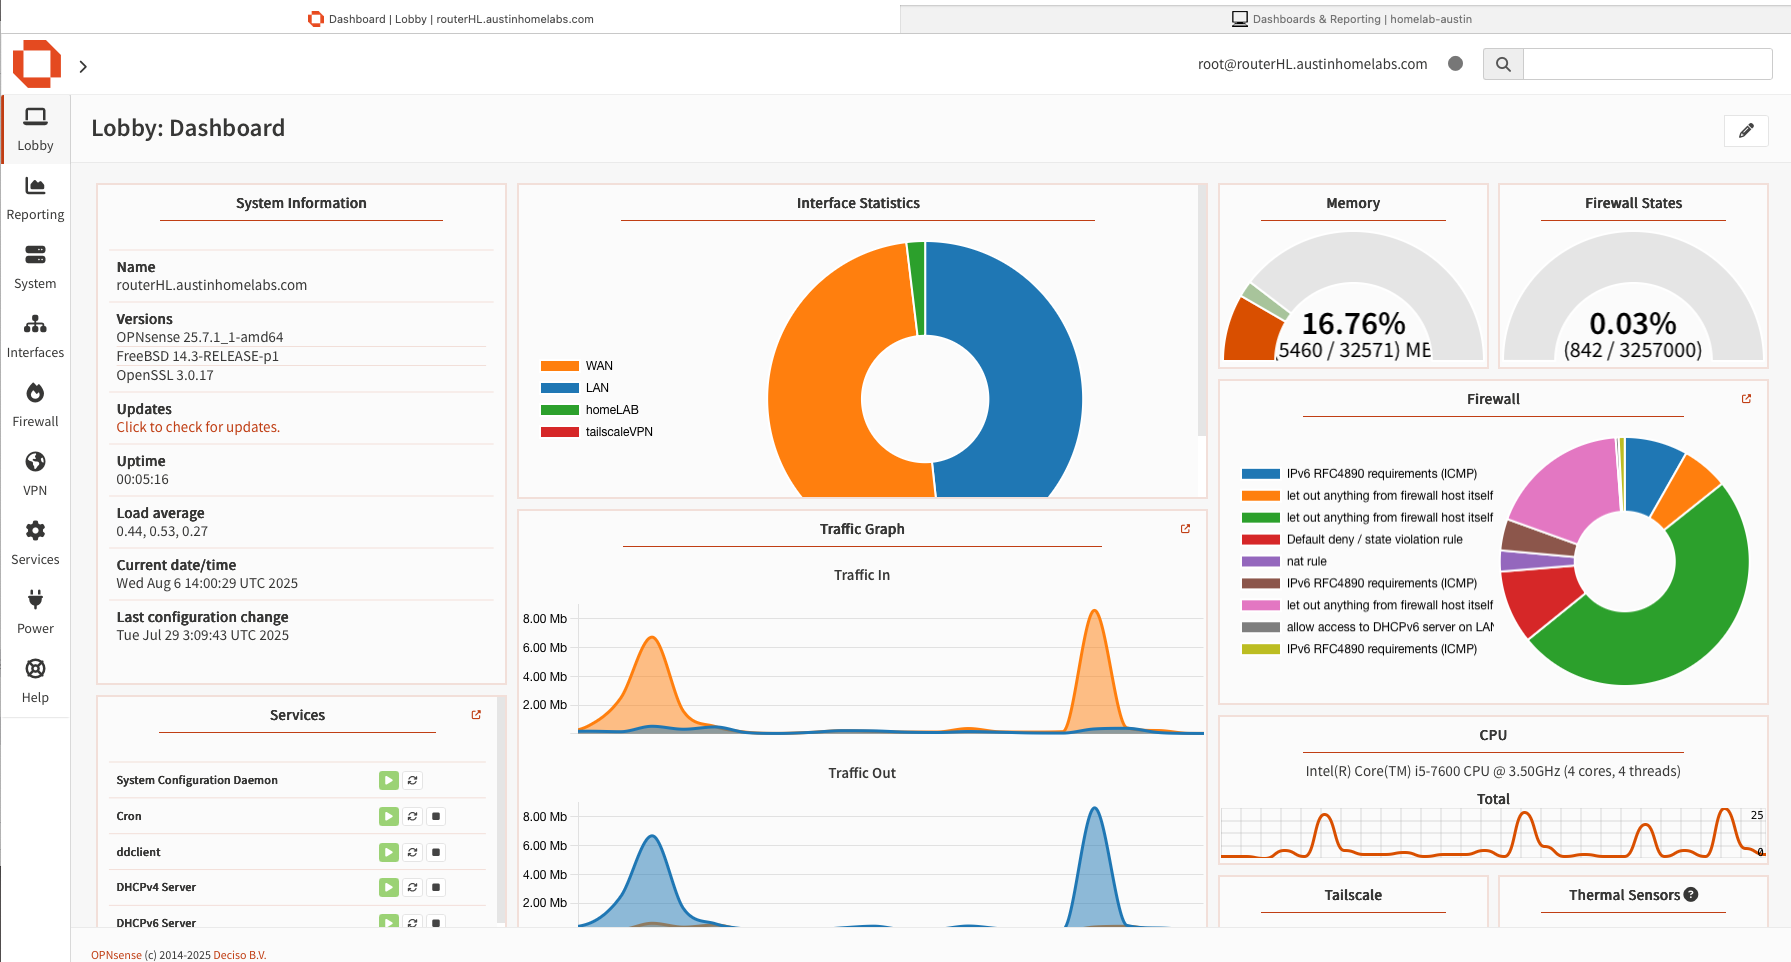
Dashboards & Reporting

- Thankfully I have a dynamic WAN IP that has since changed, making it alright to post this
ACME Certificate for Web GUI
Install
To set up a certificate with ACME, there are several steps involved. First, you'll need to install a the ACME client plug-in ( System--> Firmware --> Plug-Ins )
OPNsense Upgrade - Version 25.7
For the past 2–3 years, I've maintained a stable OPNsense deployment as the core network appliance of my home network infrastructure. This project has provided advanced firewalling, traffic shaping, VPN, and monitoring capabilities, all tailored to my household needs. Over the years, it’s proven to be a reliable and secure solution.
Most recently, I performed a seamless upgrade to the latest OPNsense version, ensuring continued performance and compatibility with current features—all without downtime or issues. The upgrade not only ensures security hardening, but also comes with a refreshed UI!