OPNsense Local Configuration
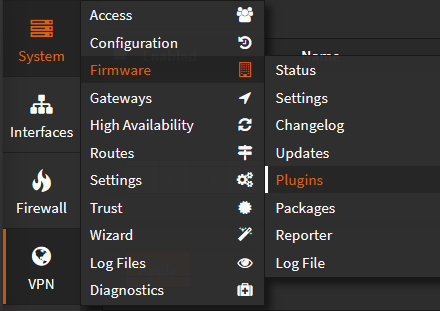
To get started with WireGuard in OPNsense, download & install the plug-in available by naviagting through the Web GUI @ System ---> Firmware ---> Plugins:
Instance/Peer
Next, find Wireguard under the VPN tab in the menu and select WireGuard. Navigate to "Instances" to create and set up an instance. Select the "+" icon and edit your instance:

- Name your instance
- WireGuard uses port 51820 by default, use this port or a higher unique port
- Identify subnets and/or IPs you want accessible through the tunnels
- Generate your public and private keys by clicking the Gear Icon. Save these as you'll need it when setting up your peer
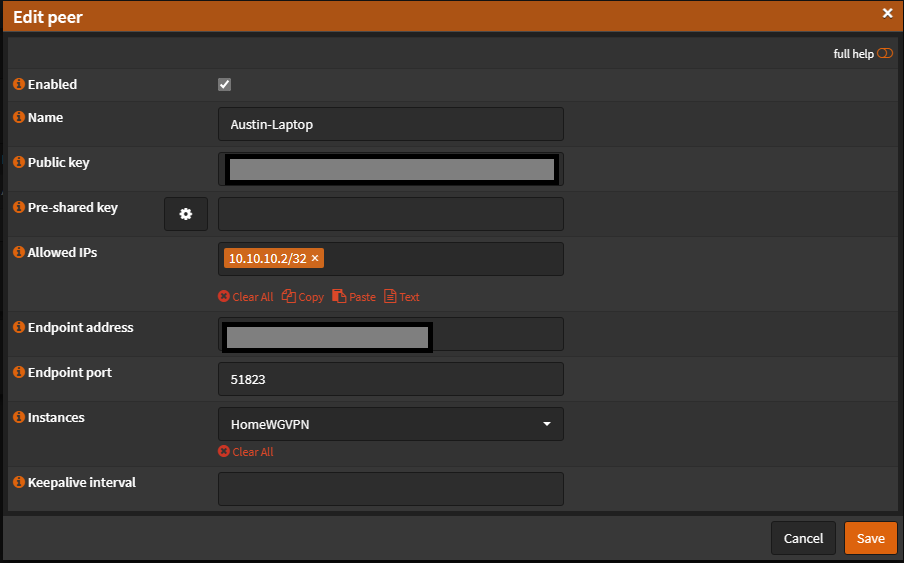
- Here, you'll want to create a name. I used Austin-laptop as I'll be configuring my laptop for connection
- Next, take the public key generated from you client tunnel configuration and input it here
- For endpoint address, input the domain or WAN IP you'll be using. If you've set up a cloudfare ddns subdomain with OPNsense client, you can do as I did:
- I entered vpn.example.com as that was the subdomain I've configured with cloudflare to automatically be updated with my WAN IP
- For allowed IPs, give your machine a designated IP address in CIDR notation in the subnet. I've established in my Instance that the tunnel will be using the 10.10.10.1/24 subnet, so I've given the peer an address of 10.10.10.2/32
Client
On your laptop or WireGuard client that will be connecting to this network, you'll need to set up a config file.
Install the WireGuard client by downloading it from their website - WireGuard
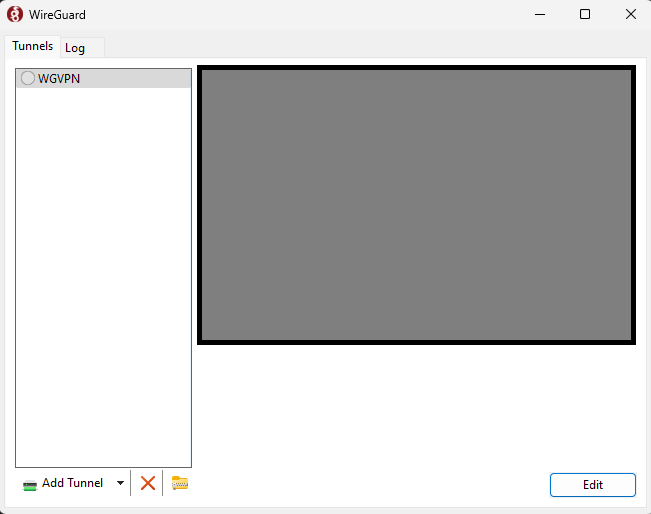
Launch the client on your laptop, and select add tunnel:
Next, you be able to configure your tunnel
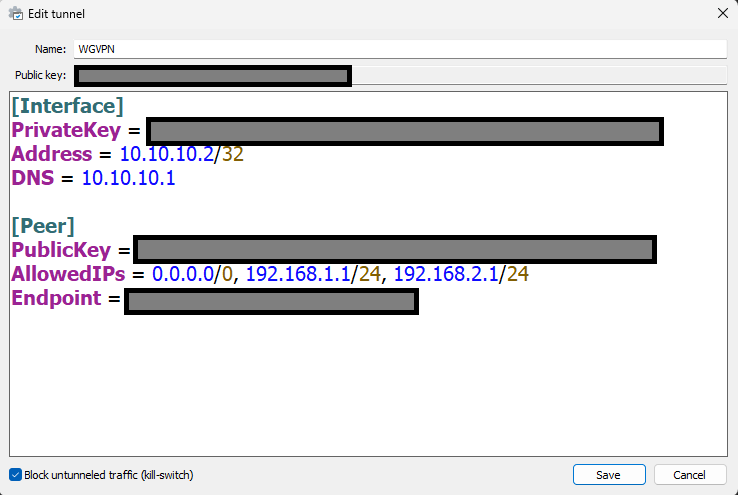
- When configuring your client, add the Address line and use your AllowedIP that you entered in your OPNsense Peer configuration
- For DNS, enter your gateway, or a specific DNS server you use
- For PublicKey, enter the Public Key of the instance that was created in OPNsense
- For AllowedIPs, enter the subnets or specific IPs you'd like to access
- For endpoint, enter your WAN IP & port#. If you're using a subdomain with Cloudflare DDNS, enter your.subdomain.com:portnumber
With OPNsense configured and your client configured, you'll just need to configure some firewall rules to let your computer access local devices. Check out the next page to see how!