Setting Up Server as Active Directory Domain Controller
Keeping it simple, setselect install Active Directory Domain Services and DNS Server, via Manage ---> Add Roles and Features.
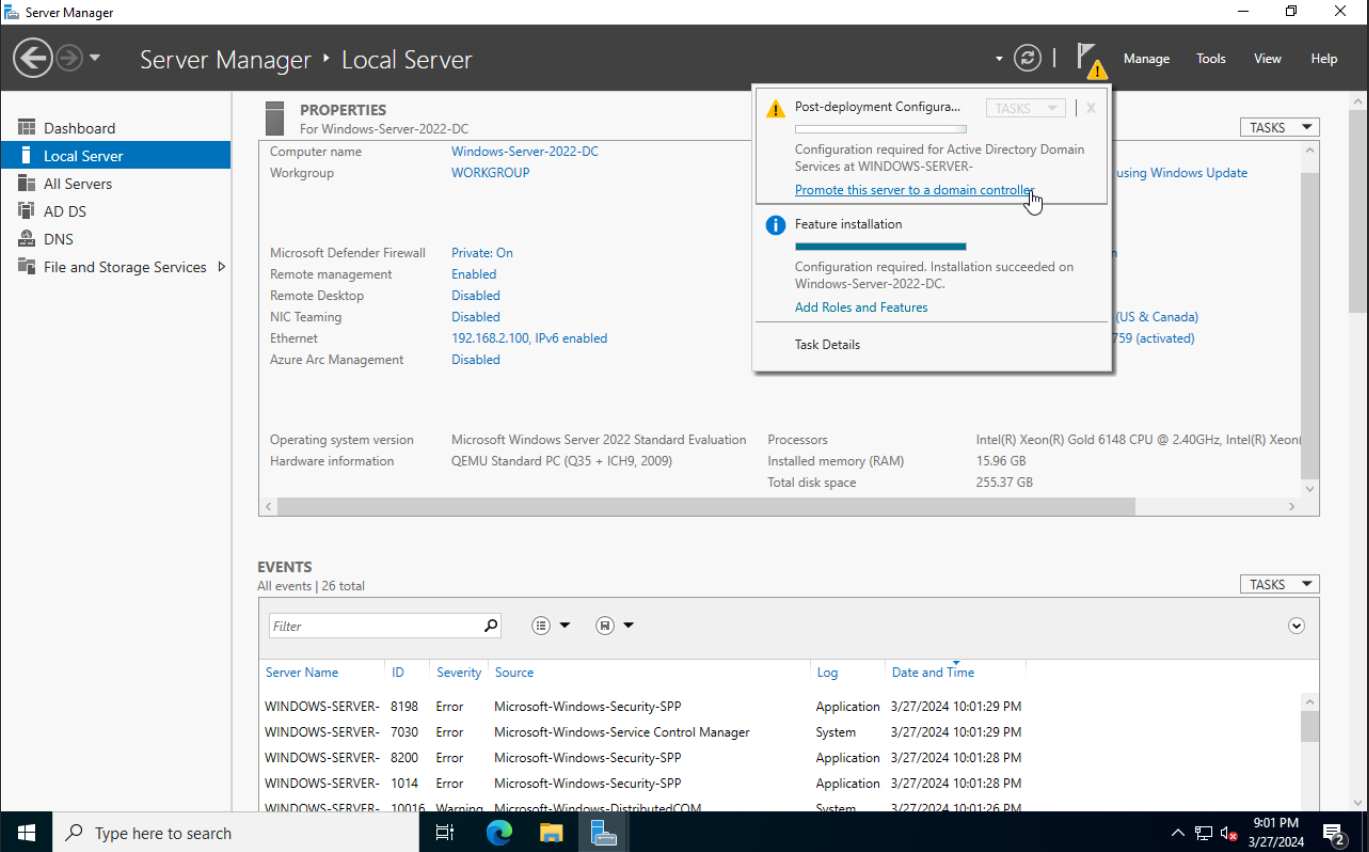
After installation, promote your Windows server to a Domain Controller :
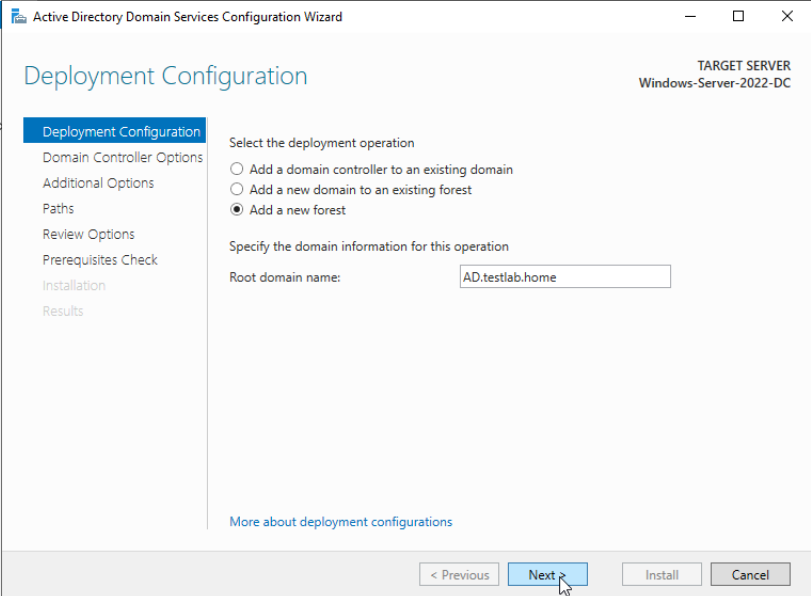
A Deployment Configuration Wizard screen will pop-up. This step is important to properly setting up active directory services! Select Add a new Forest to begin the configuration wizard:
- Here you can see I've entered AD.testlab.home as my Root Domain Name
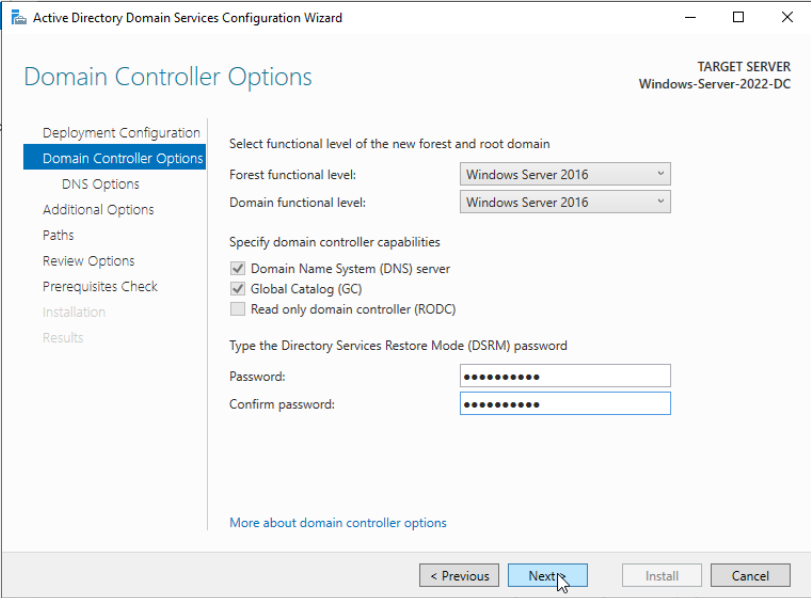
- Here you can set levels if you plan on connecting other Windows Servers. For my purposes, I'll be keeping it at its default of Windows Server 2016
- Set your DSRM password and store it safely.
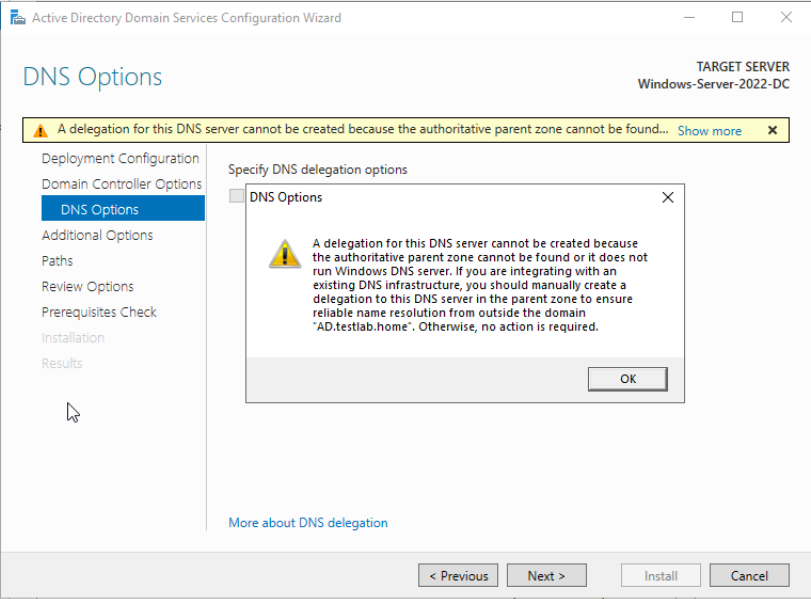
If you're setting this up in a test environment, you'll likely see the following warning pop-up. For our purposes, this is okay:
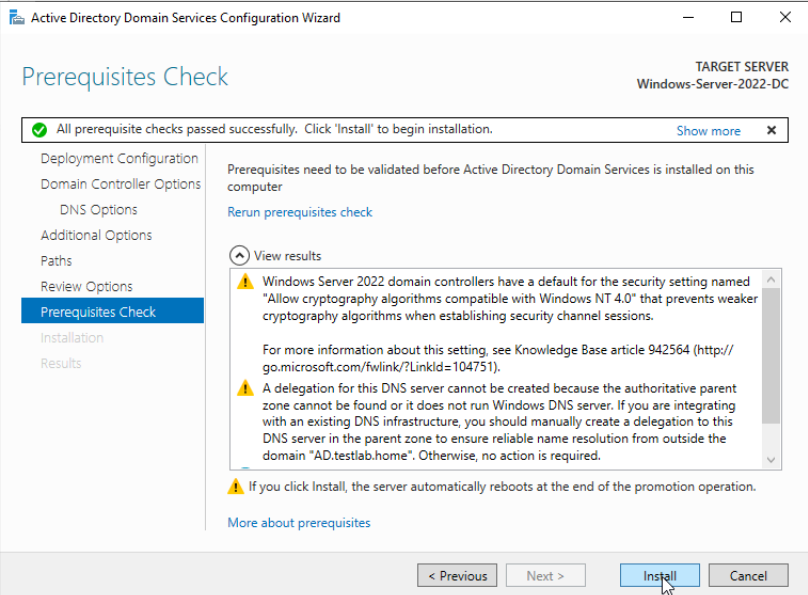
Click through Additional Options, Paths, and Review Options to get to the prerequisite checks:
- Again, these warnings are okay for test environments. For production, you'll want to acknowledge them and make changes accordingly.
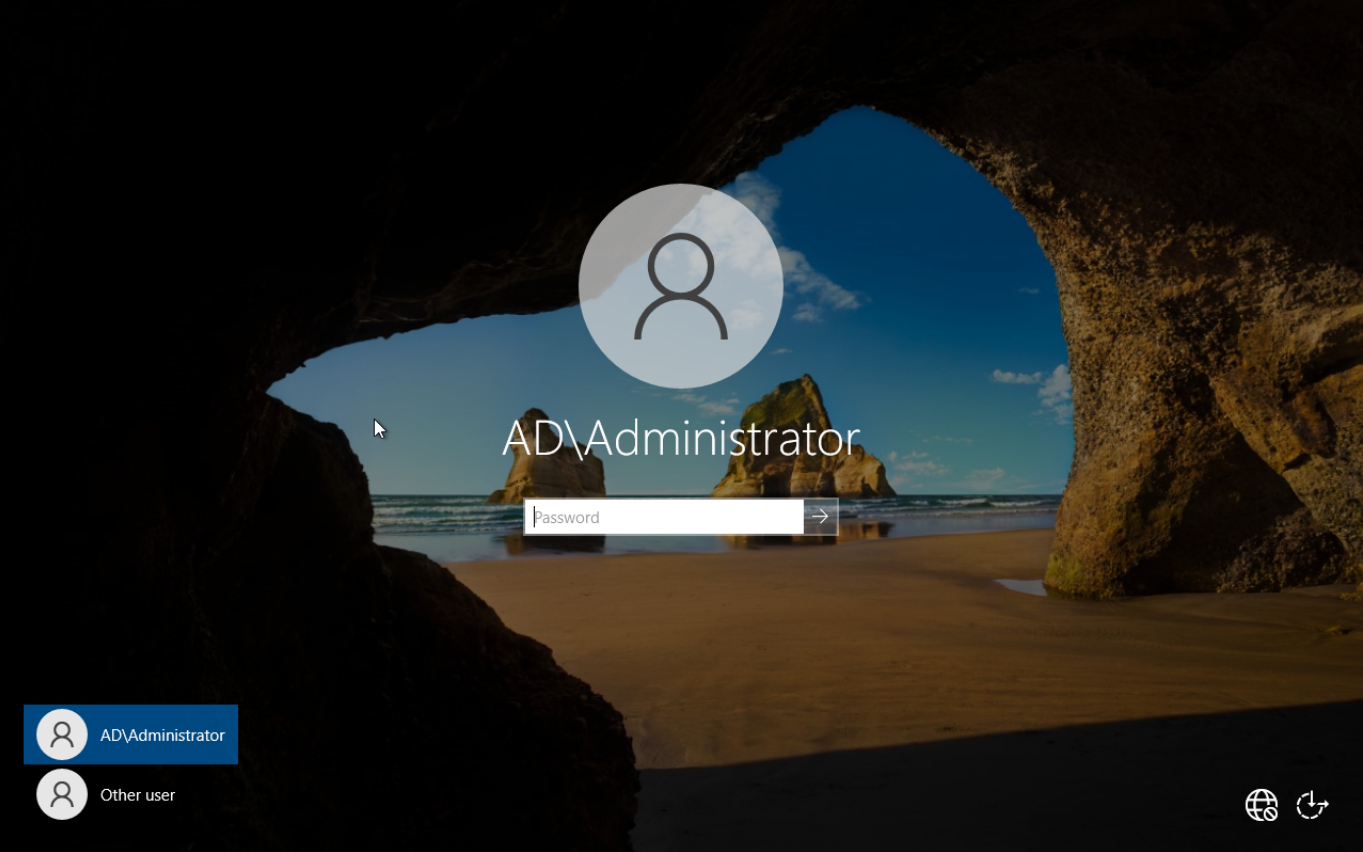
- After installation, the server will need to restart, and you should now be able to log in as Domain Administrator, which should say AD/administrator:
Useful Tips:
- If you're like me, you're using an evaluation copy of Windows and don't have any plans of purchasing a costly license anytime soon. To rearm the license and reset the count back to 180 days, run the following command in PowerShell:
-
slmgr -rearm
-

