DNS Configurations
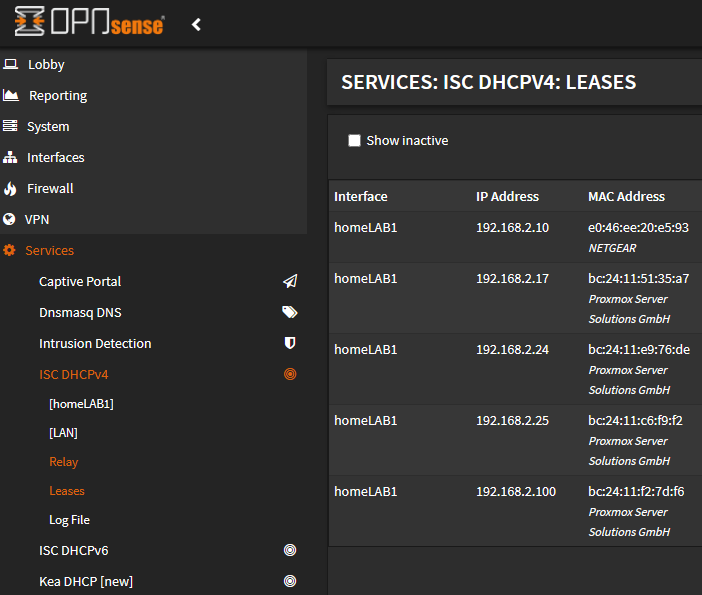
After setting up your VM and installing Windows 11 Pro, you'll need to configure some DNS routing to make sure your VMs can reach your Domain Controller. I've done this via my OPNsense router and I'll be using "User 2" to demonstrate, Windows 11 Pro VM I've set up. To do this, I configured DNS leases for the VMs via the web GUI as follows:
Next, select the "+" icon to add a static mapping:
To assign a static IP, enter the IP in the IP Address box:
Save and Apply Changes. You should know see the IP Assignment type change to "Static":
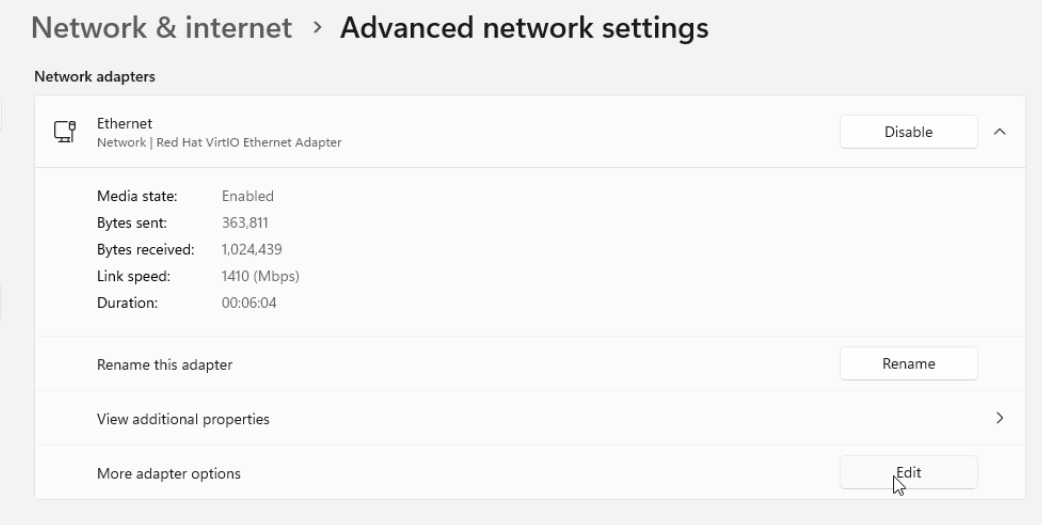
You may note that there are now 2 listings for the same device. We now need to change the Adapter settings on the VM. To do this, navigate to Settings --> Network & Internet ---> Advanced Network Settings. Select "Edit" next to More Adapter Options:
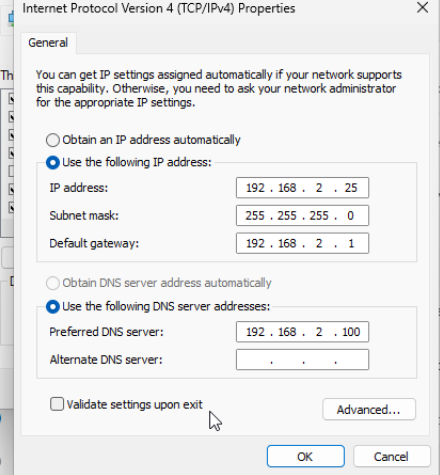
Select IPv4 Properties, and assign it the static IP. We'll also assign it the DNS of Domain Controller we set up earlier. My Domain Controller is at 192.168.2.100, so I'll change properties accordingly:
After making these changes, you'll see only one assignment for this VM's mac address, a static one:
You're now ready to add it to your workgroup. Check the next page for how to add it!


No Comments